Perhaps you’ve noticed a nasty odor emanating from your RV toilet recently, or perhaps you’ve noticed that the flush doesn’t clean as efficiently as it could. Both are possible causes. In either case, the cause is the same: there is not enough water in the toilet bowl. So
Perhaps you’ve noticed a nasty odor emanating from your RV toilet recently, or perhaps you’ve noticed that the flush doesn’t clean as efficiently as it could. Both are possible causes. In either case, the cause is the same: there is not enough water in the toilet bowl. So why won’t your RV toilet hold water?
The most typical fix for this issue is to swap out the toilet’s blade seals. To accomplish this, take out your old toilet, separate the top and bottom halves, and install the new one. Replace your old toilet.
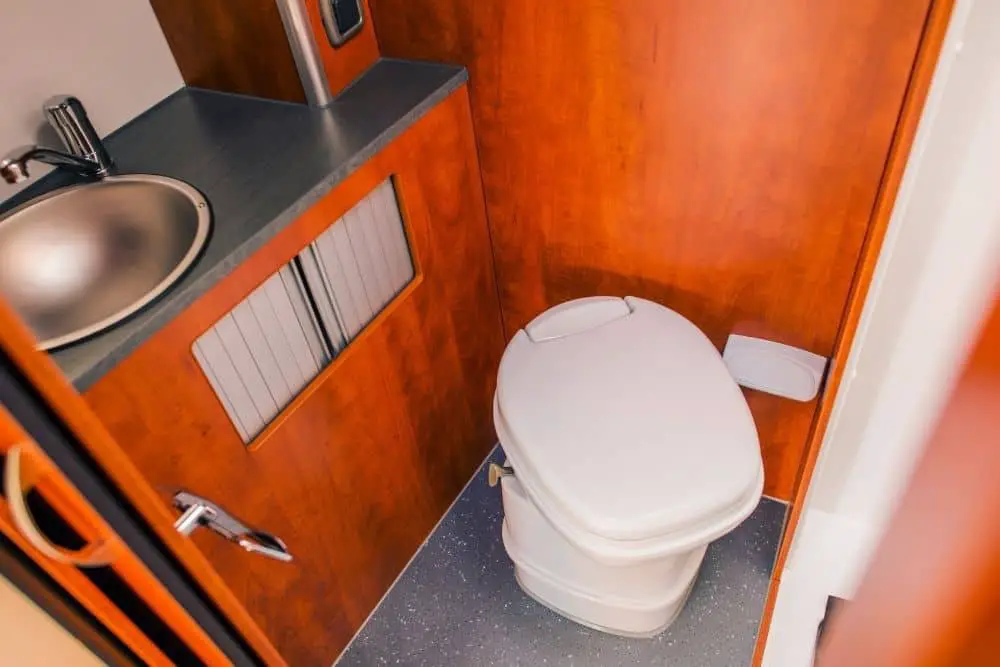
How Does an RV Toilet Work?
Toilets normally come in one of two configurations: one piece or two pieces. Instead of a bulky tank, RV toilets use a whole different system.
Pushing a pedal at the bottom of the toilet flushes it in most RVs. The pedal on the toilet opens a flap at the base of the bowl. The black water tank under the RV collects the waste from the toilet.
How do you fix an RV toilet that won’t hold water?
There are many ways to fix an RV toilet that won’t hold water. Here are a few different ways to accomplish this.
Clean Your Seal
It’s best to clean the seal around your toilet blade seats first before replacing them. It is common for RV dealerships and supply stores to sell specialized tools for cleaning your blade seal groove. In the absence of this, a nail file will do the trick.
The first step is to shut off the water supply to your RV by turning off the water pump or valve. Flush to remove any leftover water pressure.
Now all you have to do is spray some cleaner on your cleaning tool. Once you’ve removed all of the debris, use your spray cleaner to completely clean the groove. Finally, make sure the issue has been resolved by running some tests.
How To Replace The Blade Seal
When your toilet bowl doesn’t hold water, the most likely culprit is a faulty blade seal. Fortunately, they’re not too expensive to replace, costing between $10 and $20 on Amazon.
There are many different types of RV toilets, so we’ll present a generic approach that should work for most of them. Here’s how to swap out a blade seal on an RV Toilet.
- Shut off the water valve or the water pump on your RV. Flush to remove any leftover water pressure.
- Remove your toilet. The water supply line from the back of your toilet, where it attaches to the toilet’s water valve, needs to be disconnected. Remove the two nuts that hold the toilet to the floor and the black tank, and then proceed with the installation.
- Disconnect the top from the base. A panel on the back of your toilet will allow you to access two screws that need to be removed. If your model has any hoses that can obstruct the removal, be sure to disconnect them.
- Remove the top. To take off the top, rotate it while pulling up on it. Plastic clips may be used to hold it on; if so, make sure to remove them.
- Replace blade seal. The blade seal should now be available to you. Fit your new seal after thoroughly cleaning the place it will be mounted into.
- Consider other seals. The rubber seal between your toilet and the floor may need to be replaced while the toilet is out of service. Replace it. This is fairly similar to changing out a toilet’s rubber flapper seal with a new one.
- Reinstall your toilet. To install, simply reverse the removal process, but before you do, fill your toilet bowl with water to ensure the seal is tight.
How To Temporarily Seal
A busted seal might ruin a camping trip if you’re in an RV and traveling with it. Unfortunately, a new blade seal is not always readily available.
A temporary solution could lie in one of your personal belongings. It’s possible that petroleum jelly can slow or halt the leak momentarily.
- First, turn off your toilet water. To bleed the toilet, turn off the water supply and flush the toilet as described above.
- Second, prevent fumes. Be sure to close the bathroom door and skylight to prevent fumes from leaking into the rest of the house. When you open the blade seal, the black water tank will be visible.
- Apply the jelly to a cotton ball or ear swab. Instead of scrubbing your toilet, use this cotton ball instead. It won’t destroy your toilet’s seal any more.
- Rub into the seal. Apply the petroleum jelly on the toilet’s blade seal while the toilet is in the flushing position. Take your time, and pay attention to the area where the blade meets the seal.
This is just a stopgap measure until you can find a permanent solution. This could at least buy you some time till a new one arrives.
The Pedal Won’t Return
If you have a toilet with a pedal or lever, you may notice that it doesn’t always return to its starting position completely. As soon as you release the water, it will continue to drain.
Spray some penetrating lubricant into the pedal joint and see if it helps fix the problem. Then, repeatedly open and close the pedal when it’s been completely covered. For the time being, this will usually help it to sit down.
How To Replace an RV Toilet Valve
Make sure your pedal is functional before troubleshooting any other problems. If the pedal works, but the toilet isn’t filled with water, the problem is most likely with the water valve.
It’s not difficult to repair the entire toilet, but replacing the water valve is much easier. These may be easily located and normally range from $20 to $50 in price. Here’s how to replace it now.
- Stop the water flow by closing the water valve or turning off the water pump. To release the water pressure, flush your toilet. If you’ve previously cut your toilet’s water source but have been using your pump still, try running a sink to relieve pressure.
- Remove your toilet. The water supply pipe at the bottom of the water valve at the back of your toilet must be disconnected. Remove the two nuts that keep the toilet and black tank together.
- Be prepared for the smell. As a precaution, have some air freshener and filter masks on hand in case the stench becomes overpowering. To minimize odor transfer, place a towel over the opening.
- Remove the pedal. This is often something you should be able to pull off with your hands.
- Remove the water inlet hose. If there is a compression spring attached, remove it with needle-nose pliers.
- Remove the water valve. It should be possible to remove the water valve with or without removing one screw.
- Reinstall. Reassembling is as simple as undoing the actions you took during disassembly. Make certain the pedal is properly connected to the water valve before continuing. The valve can be twisted onto the pedal if necessary before being connected to the toilet valve.
Why Does My RV Toilet Have Low Water Pressure?
Low water pressure in the toilet can be caused by a variety of issues. The foot valve filter could be causing an issue. This means you have to remove the valve, dismantle and clean it if that’s the case.
A kink in the line or a clogged hose may also be to blame for low pressure. If this is the case, straighten out the hose. The hose may need to be replaced in this situation.
What Cleaner Should I Use with My RV Toilet?
While it comes to cleaning your toilet, you need to exercise caution when choosing a cleaner. Chemicals such as bleach and hydrogen peroxide are common ingredients in commercial cleaners. These have the potential to damage your plumbing’s plastic and rubber seals.
Seals can be damaged even by common household cleaners like vinegar and baking soda. When cleaning the toilet, use mild plant-based cleaners wherever possible.
Can I Upgrade My RV Toilet?
Thetford Aqua Magic toilets are standard in RVs. Luxury RVs and campers, on the other hand, may use a different design.
There are a growing variety of options available for upgrading your RV toilet.
Major RV toilet manufacturers including Thetford, Dometic, and others provide china models that are more like a house toilet. Additionally, many of them have a greater profile, which some users like.
Existing RV toilets can be upgraded by adding various add-ons. A bidet seat attachment, for example, may give your bathroom a spa-like feel without having to replace the entire device.
In Conclusion
A damaged RV toilet may spoil your entire camping trip because it is such an integral feature of your camper. If you’ve read this far, you should have a better idea of why your RV toilet stopped holding water and what you can do to fix it, as well as how an RV toilet works in general.
