Blackwater tanks are a necessity for those who camp in their RV. It can be challenging to know how to maintain these tanks, but it is crucial that you do because they provide a safe and sanitary environment for your family while on the road. In this post, we will discuss the proper maintenance of an RV black water tank.
An RV typically has three tanks. A water tank, a gray water tank, and a black water tank. It is essential to know which tank is where in your camper.
What is an RV black water tank?
An RV black water tank is a tank that holds the waste from your RV’s toilet. These tanks are typically emptied when they are full, and they must be cleaned regularly to avoid any potential health hazards or odors in an enclosed space.
The black water tank is typically emptied when it reaches a certain level and then flushed with fresh or saltwater. The tanks are cleaned by either using chemicals to break down the waste for bacteria to decompose organic matter easier or flushing the tank with water. In both cases, these processes produce effluent wastewater containing much less solids than raw sewerage.
What’s the difference between gray water and black water?
The difference between gray water and black water is that gray wastewater comes from sources other than the toilet. Gray waste includes bath, sink, or dishwasher discharge, while Black Water only refers to sewage coming out of a flushable commode (toilet).
While gray water does contain some bacteria, it is safe to dump it on the ground. Blackwater is not safe to dump anywhere except in septic tanks, as it contains many harmful bacteria and viruses that can cause illness in people.
How often should you dump and empty your black water tank?
The black water tank should be emptied and dumped when it’s about 2/3 full.
If you don’t use your camper all the time, the black tank should be drained at least once a year to keep the system from getting clogged up, which can lead to sewage backing up into your RV.
When it comes to emptying your tanks, there are a few different considerations. If you’re traveling with a large number of people, then every other day may be enough for you; but if not, and just yourself or someone else in the car with you, wait until they get about two-thirds full before draining them.
Don’t leave the valves open all the time as that allows the harder waste to stay in the tank and the liquid to drain out. If you have a problem with the black tank, then it may be time to clean your system. You can do this by flushing out all of its pipes and hoses or running water through them for about 15 minutes before draining again. But if that doesn’t work after two times doing so in succession (or three days), you may want to call an RV service technician as soon as possible. The reason is that it could also just simply not enough room left inside where everything is clogged up together too tightly already from being used over many years without any maintenance.
You’ll want to clean your RV’s black water holding tank, though. This should be done around once a month or even every two months, depending on how often you use it and the number of people living in the vehicle with you.
How do I dump my waste from my black water tank?
Wastewater from a black water tank can be disposed of in one of two ways. You can either pump the waste into a septic system or you can dispose of it using an RV dump station. Depending on your location, you may have to pay for dumping at an RV dump station; however, if your site is equipped with a septic system, then all you need to do is hook up the hose and pump out as much liquid as possible.
Always drain the black water first.
When dumping your tanks, you want to dump your black water tank first, then your gray water tank. The reason for doing this is because the gray water will help clean out your sewer hose.
A good rule of thumb is to dump your black water tank first. Then wait a few minutes before dumping the gray tanks so that any remaining liquid in them will drain out and not clog up again when you try pumping it into septic or sewer system lines at an RV park’s disposal station (aka “dump”).
It’s a good idea to keep your tanks closed at all times, even when you’re set up and connected. However, if you must keep your gray tank open, be sure to close it and give it time to fill it before you have to dump the black water tank.
Steps to dump your black water holding tank
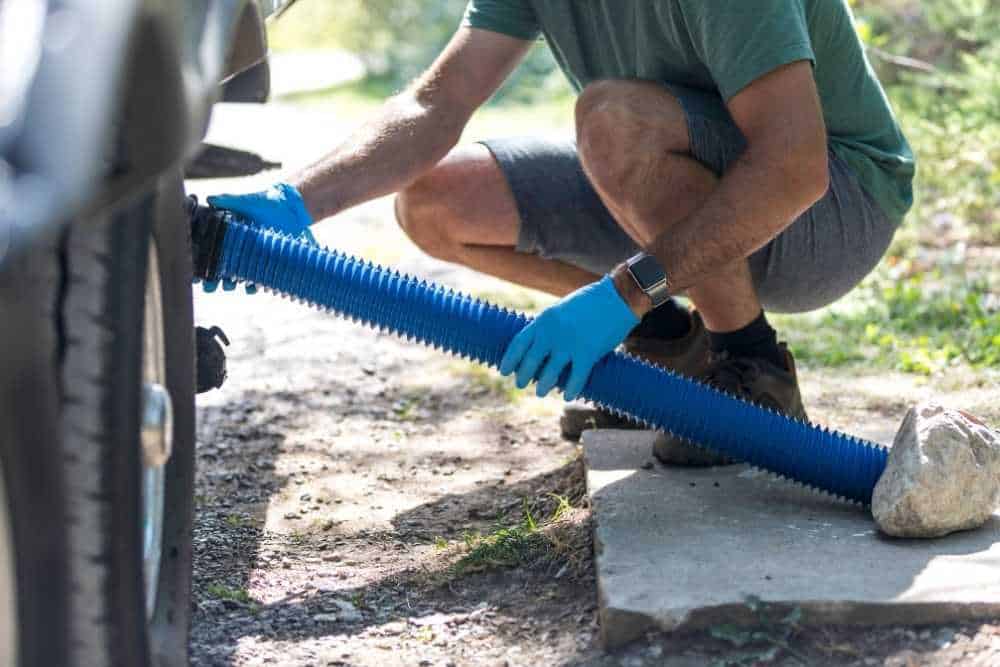
The first step to cleaning your RV’s sewer system is installing a high-quality, reliable hose. There are two valves on the outlet drain of most RVs for gray and black water. Always make sure you know which valve you need before proceeding. The next thing you need to do with that hose is attached its other end firmly in place at the sewage connection point where you are emptying your tank. To avoid any nasty surprises, you should always drain the black water first.
When it comes to emptying your tanks, always be sure you pull the black water valve first. If you don’t do this thoroughly enough, solids get stuck, and liquids flow through, leading to a very messy situation! Once that tank is empty of all liquid sounds (no more rushing sound), close the base’s valve inlet before pulling on the gray water lid/valve for an additional drain. Ensure not to open any other valves during these times as they can cause pressure problems with pipes or hoses. By shutting off the valve of your gray water tank, you’re always building up soapy water that can be used to flush out black waste from your hose.
After disconnecting the hose from your RV, rinse it with fresh water and dry it before storing it. The best way to prevent any mess or odor is by properly storing your hose between uses.
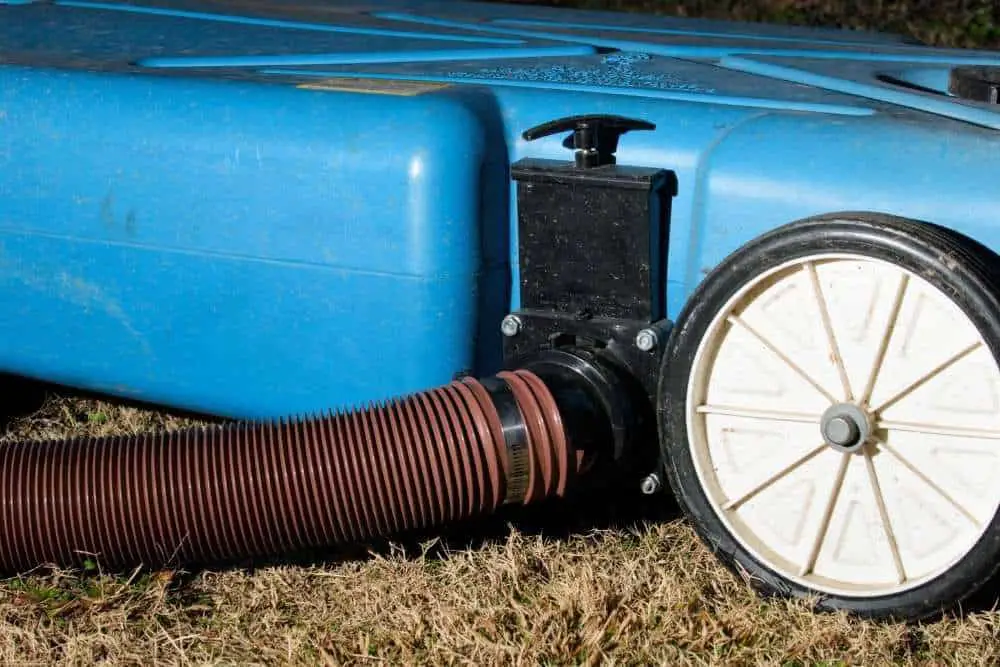
What are Portable RV Waste Tanks
Portable RV waste tanks are a great way to store your RV’s waste and make sure it doesn’t leak out. They are easy-to-use, lightweight tanks that can be easily transported from one location or vehicle (like an Rv). The best part about them is they come in various sizes, so you’re able for any type/size tank on the market!
How do I clean my RV black water tank?
Cleaning your RV black water tank is important to do periodically. This will ensure that the tank is clean and ready for use and help prevent any odors from building up in it.
The benefits of a regularly scheduled cleaning service are many. You’ll prevent unpleasant odors, keep your sewer system clear, so it’s always running smoothly and efficiently, even keeping the tank sensors working correctly to avoid false alarms!
To clean your RV black water tank, you will want to follow these steps:
Drain your tank. You can do this by following the steps listed above.
Remove Waste Buildup. Use a hose to spray down any visible dirt or debris in your sewer system and rinse off with clean water. You’ll need to have a flush valve or tank cleaning wand if your RV doesn’t already come with one. You can find these items online and sometimes in hardware stores near you.
You’ll want to rinse and flush the black water holding tank. Then, you’ll get in touch with your inner clean freak by cleaning out this sucker! Flush your toilet a few times, then add some dish soap or laundry soap along with about 1 quart of bleach. Let it sit for around an hour.
- When you use a flush valve, simply connect the gray water line to the flush valve and get plenty of pressure filling up that tank. This way, you won’t have clogs or unpleasant odors in there either! Keep an eye on those pipes when cleaning them out, too–just make sure they are open, so nothing gets stuck inside.
- Connecting a tank cleaning wand to an outside water hose will allow you the power rinse your RV’s toilet bowl. Turn on the hose so that it sprays as forcefully as possible, and insert the wand into your toilet bowl for thorough clean-up!
You can now open the dump valve! You’ll want to leave it opened throughout this process and just let your tank cleaning wand keep spraying for 10-15 minutes.
It can be a hassle to maintain your black tank, but luckily there are ways to make it easier. When you start out on your trip, add some RV Black water tank treatment which comes in liquid or Tide-Pods like these made by Firebelly Outfitters so that the chemicals will have time to do their job and break down the solid waste and toilet paper. Along with keeping odors down, this also makes for an easy process!
What is RV black tank flushing?
RV black tank flushing is a way to clean your RV’s waste tanks. One simple way of doing this would be connecting the hose directly to an inlet valve and power washing it, making sure you have done anything that could contaminate the water coming into or out from inside.
RVs come in many shapes and sizes. Some have a built-in RV black tank flush system, which allows you to connect a hose directly to an inlet valve for power washing your tanks. This makes it super simple to ensure that every part of the inside is sparkling clean!
Bleach in Your Black Water Tank
Bleach is a chemical that can be used to clean the black water tank and kill bacteria. However, too much bleach may damage seals or gaskets in an RV. Other chemicals are available, such as diluted bleach (safer than using undiluted bleach) or hydrogen peroxide, which will do just fine for cleaning tanks without damaging them either!
How Long do You Leave Bleach in RV Black Water Tank?
You should leave the bleach solution in your RV black water tank for at least 8 hours. It would be best to do this before a long drive because the bleach solution will work better if it has time to circulate.
Mixing bleach and water is the best way to clean your RV’s waste holding tanks. To make a solution, mix 1/4 cup of bleach with a gallon of tap water. This will be enough for most RVs’ size toilets or larger.”
The best way to clean and sanitize your RV waste holding tanks is to fill the tank with a bleach and water solution. To make the solution, mix one-quarter cup of bleach with one gallon of water. The total amount of bleach-water solution you will need depends upon the size of RV waste holding tanks you have. To make the solution, mix one-quarter cup of bleach with one gallon of water. This cleaning mixture’s total amount depends on how many gallons you have in your tank, but it’s usually about eight gallons.
In Conclusion
It’s important to remember to clean your tanks regularly to keep them properly maintained and avoid any problems, but don’t worry. It’s easier than you think with the right tools. Cleaning your RV’s black tank is important for the health of you and those around you. It can help prevent odor problems, gas leaks, or worse yet, a sewage backup in your rig.
